
Connecting up to 16 A Electrical Load
The installation may only be done by qualified electricians!
System Description
If the electrical load you want to connect to the Fabman Bridge is higher than 10 A, do not use the power cord that came with the product. The C13 and C14 plug in the enclosure are rated op to 10 A only. For loads up to 16 A you can connect the power cables directly to the terminals on the PCB of the Fabman Bridge instead of using the C13 and C14 plugs.
This guide describes the installation with Fabman Bridge V2. To complete this installation you’ll need both a T8 and T10 screwdriver (not included).
Hardware Installation
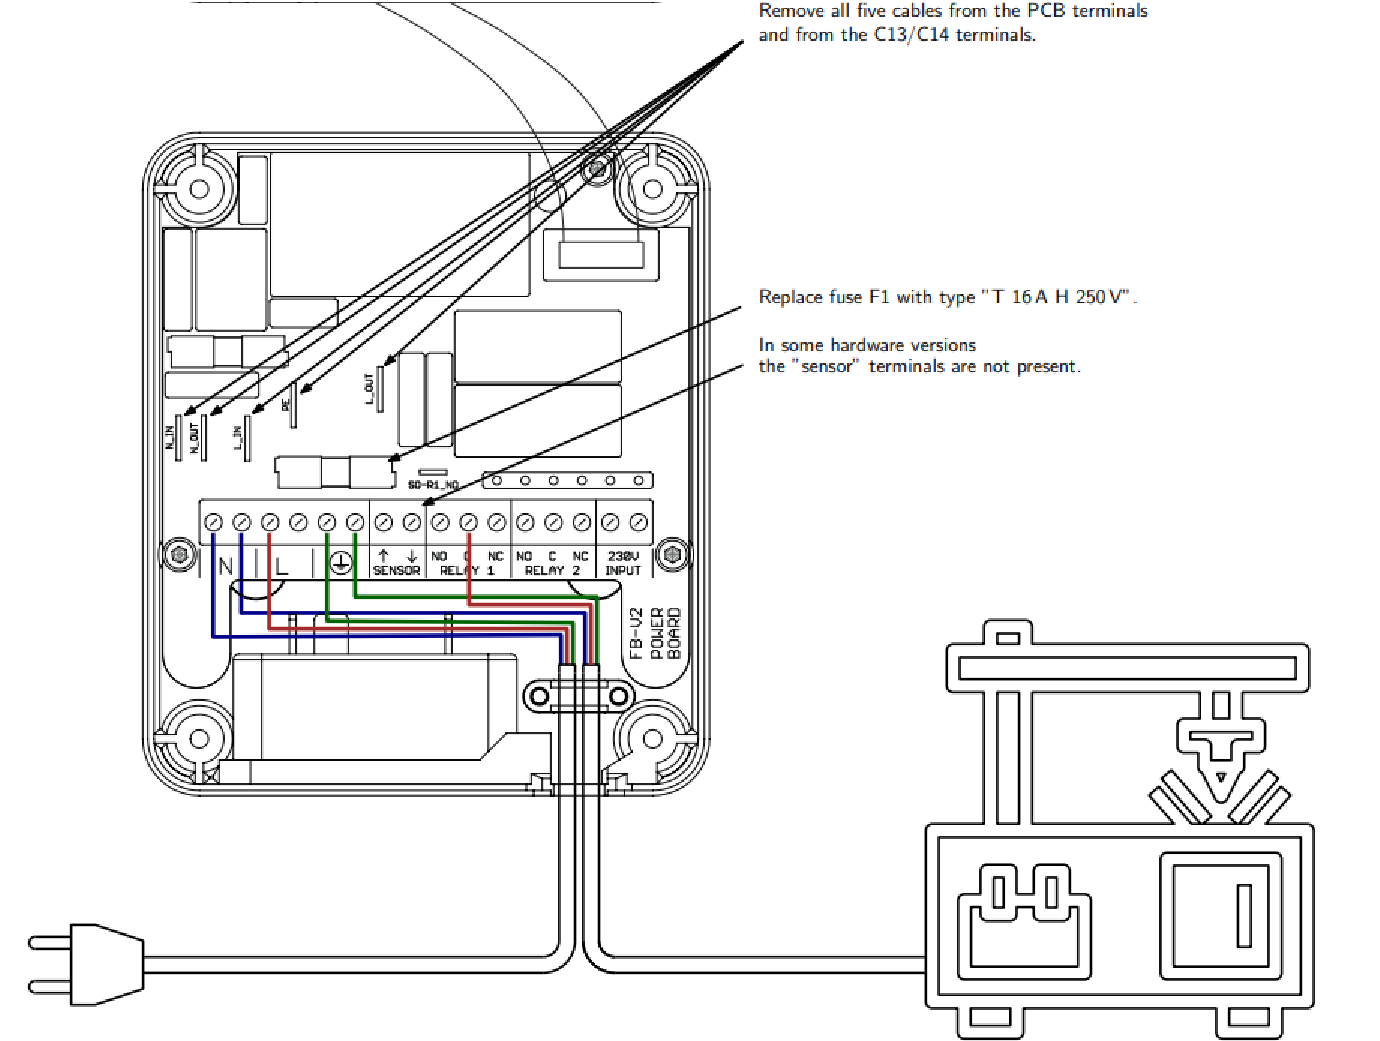
To connect directly to the terminals on the PCB follow these steps:
- Unplug the Fabman-Bridge from the electrical outlet and disconnect all other cables (e.g. connections to the controlled machine) before you start with the hardware installation.
- Open the enclosure of the Fabman Bridge carefully (T8 screwdriver needed).
-
Remove all five factory-fitted wire jumpers (yellow/green, red, blue, gray, and brown).

- For easier installation of power cables, remove the power board (T10 screwdriver needed).
-
Replace fuse F1 with type "T 16 A H 250 V".
-
Reinstall the board in the housing and guide the cables through the opening provided. You must carefully break off part of the cover on the bottom of the housing. Then fix the cables with the existing strain relief straps (T10 screwdriver needed) and close the housing again (T8 screwdriver needed).


